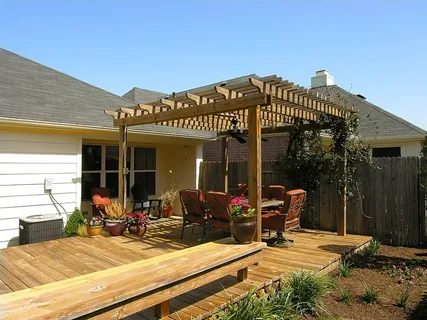
A well-designed backyard can be a peaceful retreat or a vibrant gathering spot for family and friends. One of the best ways to enhance your outdoor space is by adding a pergola. Specifically, a free standing pergola offers versatility and elegance without the need to attach it to your home. In this guide, we’ll walk you through how to build a stunning free standing pergola for your backyard—a DIY project that adds style, shade, and structure.
Why Choose a Free Standing Pergola?
Unlike attached pergolas, a free standing pergola can be placed anywhere in your yard. This means you can build it over a patio, next to a garden, or in a secluded corner for a private escape. These structures are perfect for defining outdoor living spaces and can be customized to fit any backyard design.
Tools and Materials You’ll Need
Before diving into construction, gather the following tools and materials:
- Pressure-treated lumber or cedar (recommended for durability)
- Concrete mix for securing posts
- Post hole digger
- Level
- Measuring tape
- Power drill and screws
- Circular saw or hand saw
- Protective gear (gloves, goggles)
Step-by-Step Guide: How to Build a Stunning Free Standing Pergola for Your Backyard
1. Plan and Measure the Area
Start by deciding where your pergola will go. Choose a flat, level area that gets the right amount of sunlight and shade. Mark out the dimensions using stakes and string. Common pergola sizes range from 8×8 feet to 12×12 feet, depending on your space.
2. Dig and Set the Posts
Use a post hole digger to create holes for the vertical posts, typically about 2 feet deep. Place each post into the hole and fill it with concrete. Use a level to ensure each post is perfectly vertical. Allow the concrete to cure for at least 24 hours before proceeding.
3. Add Support Beams and Rafters
Once the posts are set, attach the horizontal support beams to the top of the posts using heavy-duty screws or bolts. Then, lay the rafters across the top, evenly spaced. These will give your pergola its iconic open-roof look.
4. Secure and Finish
Double-check all fastenings for stability. Sand any rough edges and apply a weather-resistant wood stain or sealant. This will protect the pergola from the elements and extend its lifespan.
Decorating Your Pergola
Once your pergola is complete, you can personalize it to suit your backyard vibe. Add string lights, climbing plants like wisteria or ivy, or outdoor curtains for a touch of privacy. You can also place outdoor furniture underneath to create a cozy lounge or dining area.
Maintenance Tips
To keep your pergola looking stunning year-round:
- Inspect for signs of wear or damage annually.
- Reapply stain or sealant every 2-3 years.
- Trim plants growing on the pergola to prevent overgrowth.
Final Thoughts
Knowing how to build a stunning free standing pergola for your backyard can transform your outdoor space into a sanctuary. With careful planning, the right materials, and a bit of elbow grease, this DIY project is both achievable and rewarding. Whether you’re hosting summer dinners or enjoying a quiet evening outdoors, a pergola adds both function and flair to your backyard.
Start building your dream space today—because your backyard deserves it.


