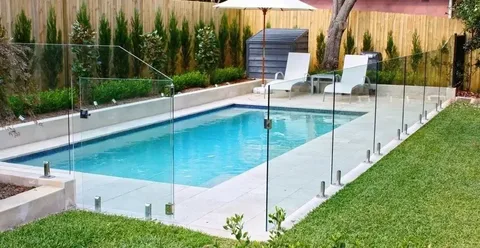
Installing a pool fence is one of the most effective ways to protect children, pets, and even adults from accidental drownings. A pool fence serves as a crucial barrier that restricts unsupervised access to the pool area. Whether you’re a DIY enthusiast or simply want to understand the process before hiring a professional, this guide will walk you through how to install a pool fence the right way.
Why a Pool Fence is Important
Before we dive into the installation process, it’s important to understand why a pool fence is essential:
- Safety: Prevents accidental drownings, especially among children and pets.
- Legal Compliance: Many states and municipalities require pool owners to install a fence.
- Privacy: Adds a layer of privacy to your backyard space.
Tools and Materials You’ll Need
Before you begin, gather the necessary tools and materials:
- Fence panels or mesh
- Fence posts
- Post hole digger or auger
- Measuring tape
- Level
- Concrete mix (for permanent posts)
- Drill and screws
- Safety goggles and gloves
How to Install a Pool Fence: A Step-by-Step Guide
Follow these steps carefully to ensure a secure and professional-looking installation.
Step 1: Plan Your Fence Layout
Measure the perimeter around your pool, keeping local building codes in mind. Plan the placement of gates and consider any landscaping or obstructions. Mark the spot where each post will go using chalk or small stakes.
Step 2: Dig Post Holes
Use a post hole digger or auger to dig holes at your marked locations. The depth of each hole should be about 1/3 the height of the fence post, usually 2 feet deep.
Step 3: Secure the Posts
Place the fence posts into the holes. For permanent installations, pour concrete into the holes to secure the posts. Ensure each post is level and aligned with the others before the concrete sets.
Step 4: Attach Fence Panels
Once the posts are secure and the concrete has cured (typically 24-48 hours), attach the fence panels using a drill and screws. Make sure the panels are evenly spaced and level.
Step 5: Install the Gate
Install a self-closing, self-latching gate that opens outward, away from the pool. This is a crucial part of how to install a pool fence that meets safety regulations.
Additional Tips for a Secure Installation
- Check Local Laws: Some regions have specific height and locking mechanism requirements.
- Regular Maintenance: Inspect the fence periodically for damage or wear.
- Temporary Options: If you’re not ready for a permanent solution, consider removable mesh fencing.
Final Thoughts
Now that you know how to install a pool fence, you can take proactive steps to enhance the safety of your pool area. Whether you’re installing it yourself or supervising the process, understanding each step ensures a reliable and code-compliant barrier. Always prioritize safety and consult local regulations before starting your installation.


